
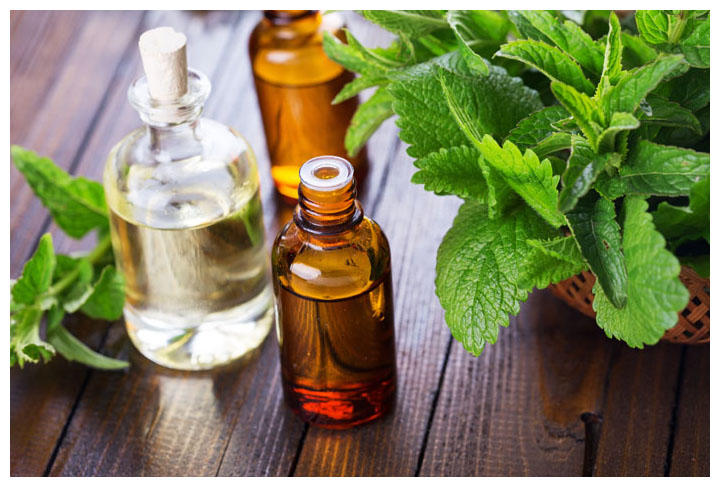
How to Make Peppermint Oil for Your Hair at Home
Peppermint oil is extracted or distilled from peppermint plant seeds, which is available in abundance especially in North America and Europe.
It is commonly used as additive for health products for hair, skin scalp, and more.
Homemade peppermint oil is as good as the commercially available one.
Follow these instructions to make peppermint oil at your home.
1. Fresh Peppermint Leaves
You will need to prepare fresh peppermint leaves which are available in grocery stores or supermarket.
It is also possible to harvest the leaves from your own peppermint plants to ensure the quality.
It also ensures that the leaves do not contain chemicals or other additives which may alter the quality of the oil.
To begin the process, simply crush the leaves by using your hand, blender, or spoon. Store the crushed leaves in a glass jar.
What to grow you own? Read we show you how.
2. Mix with Olive Oil
Peppermint oil should only be an additive of any formula you use on your hair. It is not recommended to use this oil excessively since it can cause irritation or allergic reactions.
One of the best oil to mix with peppermint is olive oil.
Pour olive oil into the jar. Please make sure that the oil completely covers the peppermint leaves.
This can prevent the leaves or stems from spoiling and optimize the infusing process.
Shake the jar well in order to distribute the olive oil evenly.
You may need to use a chopstick or skewer to remove the bubbles.
3. Store it
Secure the lid of the jar and store it in shaded yet warm place.
You need to leave it for 3 days to allow the ingredients to infuse.
Please remember to check the jar once every day ensuring that all leaves are still completely covered in the oil.
If there are leaves that come out to the surface, use a chopstick to submerge them.
4. Strain the contents
After three days, strain the contents of the jar through a cloth.
Use a bowl to store the produced liquid.
You will not need the leaves anymore at this point, so you can discard them.
5. Refill
Refill the jar with new fresh peppermint leaves and pour the produced oil into the jar again.
Repeat step 1 to 5 several times until you get the desired amount.
6. Ready to use
Once you get the desired potency, strain the peppermint oil and store it in an airtight bottle. Now your peppermint oil is ready to use.
Please keep in mind that you should only use the peppermint oil as additive, meaning you need to mix it (dilute it) with other ingredients in order to avoid allergic reactions.
Besides olive oil, you can also use other ingredients for infusing such as sesame oil, safflower oil, or canola oil.
Thinking About Growing your Own Peppermint Leaves?
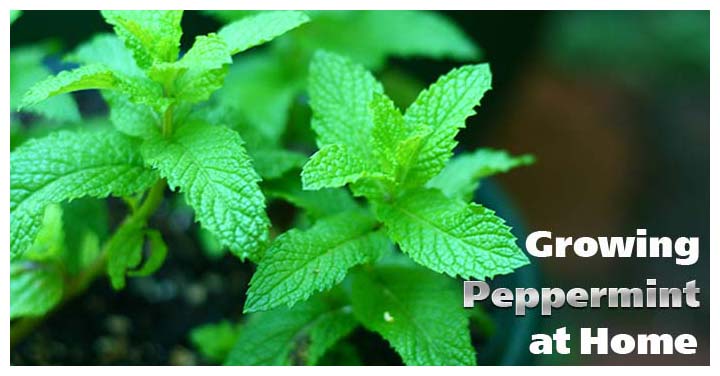
10 Easy Tips for Growing Peppermint Leaves
Peppermint works well in salads, teas, chutneys, sauces, as a garnishing herb for meats…
(anyone up for some lamb kebabs?)
…and even in chocolate chips and ice-cream!
It’s oil has antimicrobial properties and is great for sore muscles, common cold and even aching joints etc.
A leaf of peppermint makes the best mouth freshener, minus the fluoride!
… and of course, we all know how good the oil can be on your hair.
The peppermint plant, just happens to be an incredibly useful and versatile plant!
So here are some tips for growing peppermint – right in your home! (…and use the leaves to produce your own peppermint oil)
1. Peppermint is fairly easy to grow
It is the perfect plant to start your herb garden with. However, it is an invasive plant (although not as invasive as its other minty cousins).
Its roots, also known as ‘runners’ spread rapidly and new shoots start sprouting all around it. So if you are not careful, peppermint can quickly take over a complete patch of your garden or flowerbed.
So, always plant in a container or confined space.
2. Peppermint grows best when it is exposed to morning sunlight.
However, it does not like harsh sunlight and should be kept in the shade during the afternoon. Hence, your patio or kitchen window shelf is the perfect place for this plant.
3. If you insist on planting in a garden, insert a container or a mesh bag into the ground.
The container/bag should be at least half a foot deep and the top rim should be protruding above the soil level.
This prevents the roots from spreading and invading other plants. If you do not do this, peppermint will begin sprouting all over your garden like a weed!
Make sure that your container or bag does not have cracks in it.
4. Mulching around a plant
Spreading mulch around you plant or peppermint patch can also prevent the roots from spreading.
5. Peppermint does not require any special care
Just make sure that it gets enough sunlight during the mornings and late afternoons. It is best not to expose the plants to very harsh sunlight – especially if planted in a small container.
Water the plants regularly and ensure that the soil is moist. Peppermint grows in the wild along streams and so it does like moisture. The ideal conditions are moist but not too moist.
A certain school of thought says that most herbs (including mint) grow and taste best when they are just a little bit ‘thirsty’.
So experiment a bit with your plants and see what works best for you. The recommended amount is at least one inch of water per week.
6) Peppermint makes a great companion herb for tomatoes and cabbages
It deters the white cabbage moth. Keep mint containers right next to tomato or cabbage patches.
Mice and other rodents dislike the smell of peppermint – so it serves as an organic rodent repellent.
You can also spread peppermint leaves in the nooks and crannies of your house to repel insects, lizards etc.
This is much healthier and eco-friendlier than chemical pest control.
7. If planting in soil, the distance between two plants should be at least 15 inches!
Two feet (24 inches) apart is excellent. The plants should be thinned out regularly. As you may have already noticed, mint is a really prolific grower and needs to be kept in check.
Some people like to plant a mini herb garden in an elongated, rectangular pot. Such a garden features oregano, basil, chives, rosemary etc. all next to each other.
Needless to say, do NOT plant peppermint along with these herbs – it will ruin your herb garden! After a while, mint is all you will have left!
8. Peppermint prefers soil that is at least moderately rich!
9) Peppermint is perennial and has small white, pink or purple flowers.
These flowers produce copious amounts of nectar and thus they attract a lot of honeybees and some species of butterflies. However, it is best to harvest sprigs of mint BEFORE the plant flowers.
You can also pinch off the flowering buds as they appear – this helps to extend the harvest season and promotes bushier growth.
Simply pick out leaves as you need them but it is a good idea to wait till the plant is at least a few inches tall before you do this.
Do not worry about hurting the plant – peppermint is one of the hardiest herbs around.
10. Understand that there are two types of peppermint – black and white
The leaves and stems of the black variety are dark purplish-green. If you are growing peppermint for the purpose of extracting oil, then this is the one to plant as it has higher oil content.
White peppermint has green leaves and a milder flavor.
Both are equally suited to be grown at home.
We hope that soon, you will be able to enjoy the many health benefits of your very own, home-grown peppermint!